Showing posts with label Before and After. Show all posts

Thursday, June 25, 2015

Dining Room - Source list

My brother and sister-in-law spent a lot of time choosing the materials for their new dining room (formerly a covered patio - see previous post HERE). I put together a list of sources for you.
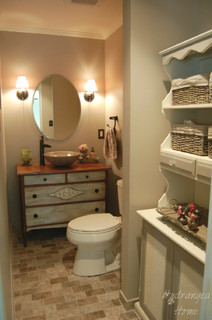
First of all, the contractor, Infinite Home Improvements really did a great job in here. I think he's going to receive a lot of referrals from this project - he does beautiful work. Click HERE for his facebook page (website under construction).


Dining Table and Chairs: Gallery Furniture in Medford, NY
Wicker end chairs: Pottery Barn
Chandelier: Shades of Light
Roman Shades: Smith and Noble
Wall color: Benjamin Moore Revere Pewter
Herboriste sign: Local home decor shop in St. James, NY (name coming soon)


Recycled Brick Flooring: Vintage Brick Salvage


Faux wood beams (I can't believe how realistic they look!): Home Depot


Hutch: a local buy-and-sell find
Accessories: Homegoods and local shops


Paris jug: Homegoods


Rustic French photo canvas art: Hydrangea Home

Let me know if you have any questions about this project or the sources. I love their new space and all of the french touches of course:)  See more photos of this room HERE.


Wednesday, June 17, 2015

and the after...Covered Porch ----> Dining Room Conversion


Last month I introduced my brother and sister-in-law's home renovation project. They had a covered porch off of the kitchen and were having it converted to a dining room.  They chose some really cool materials so I thought I would share some photos with you.


A reminder of the before:


My sister in law has a great eye for decorating. I think she should go into business. I love her taste. And was thrilled when she wanted to decorate with some of my photography. She chose a grouping of 6 photos all taken on our trip to France.


So the night we went to their home to deliver the frames and photograph the room, my brother and his wife prepared a great meal for us! Just have to share a few of the dishes.

crackers with carmelized red onions and goat cheese spread

grass fed beef crostini with gruyere

pasta with fresh tuna, arugula and lemon  

and the beautiful tablescape!


I am working on a resource list and will share in another blog post for you!  Let me know if you have any questions!


Thursday, May 14, 2015

a quick update...beams and lighting

Look what beams do to a room...LOVE! And that fixture! Now for the fun stuff...furniture and accessories.  My sister-in-law works quick so I'm predicting the room will be complete by the end of next week. Will share all sources for you when all is done!


Previous posts on this covered patio -> dining room conversion.
First post HERE
Update 1 HERE


Thursday, May 07, 2015

Weathered Wood - how-to


I know there are many techniques for achieving the weathered wood look many of us love. And I have tried many of those combinations without getting the tone I was looking for. So for my "new" coffee table I went with my own technique which gave me exactly what I wanted.


This table was being tossed by my neighbor (thank you Debbie!).

It was definitely a bit weathered, chipped and water stained. Nothing we can't fix with a good sanding.


We didn't worry about getting into the crevices too much.
And here are the products I used to achieve the weathered wood finish.
Minwax Stain- Special Walnut
Rustoleum Stain - Weathered Gray
Minwax Polycrylic in Clear Satin
Rustoleum Oil Rubbed Bronze Spray


So I think the technique I used is maybe what made a difference. I started with a coat of Special Walnut. But instead of brushing on the stain and wiping off, I used a rag (dipped in stain and squeezed out) to lightly rub the stain into the wood. Then I did the same with the Weathered Gray stain but even lighter on the amount. I was really just looking to tone down the stain with the gray but I still wanted to see warm wood tones, like it was just starting to weather. Here it is with just the top board wiped down with the weathered gray.  The bottom boards just have the Special Walnut stain.


And if you put a little too much of the gray (which I did in some spots), I just lightly sanded when all was dry.  Here is one piece all done and the other before gray was applied. Such a difference!


I didn't photograph the metal frame being painted but that's where the Rustoleum Oil Rubbed Bronze spray was used. Here we are in place.


Now, all wood will take the finish differently so make sure you do a test before you begin. I just tested a few different stains on the underside of my tabletop.  I bet oak would take this nicely with the grain.


If you give this technique a try, please share! I would love to see!


Tuesday, May 05, 2015

Update...Covered patio --> Dining Room Conversion


Things are moving along on my brother's renovation project. Moulding is up and looking great. They were painting yesterday which is always an exciting moment!


Next up will be grouting and sealing the brick floor and putting up the ceiling beams. I got a peek at the furniture and chandelier. Can't wait to see this room all decorated!


Remember the before?


Post one: HERE

Friday, May 01, 2015

"new" coffee table...a before and after

A great curbside find with a new weathered wood finish.  I will do a tutorial on how I gave this table it's new look. I finally found the combination I've been looking for to get a nice grey finish to a warm wood stain.  Busy weekend ahead so I will post the steps next week. Enjoy your weekend!


Tuesday, April 28, 2015

Covered Patio to Dining Room Project

My brother and sister-in-law are having some work done on their home. They have this great covered patio off the kitchen that they are having made into a dining room. I thought it would be fun to document the progress here and share the final reveal with sources at the end. My sister-in-law has great taste in decorating so I know you will love it!

Here is what it looked like before:


And here is what it looks like right now:


I love the peaked ceiling and recycled brick floor!

I will let you know on Instagram and Facebook when an update has been posted. This is going to be a fun one!

Sunday, January 04, 2015

The best Christmas gift...

It started with the top of a hutch. My girlfriend (thank you Elizabeth!) no longer needed the top and of course she thought of us before getting rid of it. It had beautiful lines, of course my honey could build a base for it:) That was about 3 years ago...I think. And there it sat in the dining room, empty, collecting dust.  We always have a project or 2 or 4 going on in the house but my husband was determined to finish this piece for me as a Christmas gift.  Right up until the day before we were adding the finishing touches and I'm in love!  I could finally unwrap the china and I can finish decorating this room now. I just can't stop staring at it when I walk by this room.


Here is what the before looked like:


We wanted to have it resemble the top enough so it wouldn't look like they didn't belong together.
So my husband rounded the base and added corner round to the front corners. He also routed the center support to match the top.


We thought about purchasing unfinished doors but decided to make them. I realized that I might want to add fabric to the doors so we really just needed to make a frame.


I loved the finish on the top before paint but I knew I would not be able to match the base to the top so I had no choice but to paint it. However I gave the top accent moulding and the doors just a wash of french linen to tone down the stain but still appreciate it. I love the way it came out and the way it contrasts the Graphite chalk paint (Annie Sloan). I also applied a french linen wash (after a coat of clear wax) to highlight the detailed areas of the piece.  Just a little distressing on some of the edges and a couple of coats of wax finished the piece. Just in time for Christmas!


Now the chairs need to be painted. I'm thinking french linen for them.


I chose a neutral french toile fabric for the doors. My husband did a great job pleating and stapling! 


Some of the details. The hardware on the bottom doors were in my stash from an another piece of furniture. They were a perfect match in their antique brass finish.


I think this is definitely one of my favorite pieces we've done. I was a little nervous about the dark paint but I really LOVE this look!  I think it has a french country farmhouse feel to it.  Exactly the look I'm going for in this room.


I hope this inspires you to find new life in a furniture piece of your own. Let me know if you have any questions regarding technique.

Now I just need a little sideboard piece for the opposite side of the room....the projects never end!
If he didn't do such a beautiful job, I wouldn't ask!

http://www.cedarhillfarmhouse.com/2015/01/scoop-154.html