So now that you have all of your supplies ready, let's start creating! If you are using paper to decorate your jar, cut them into the appropriate size now, use a pretty edge scissor too if you'd like. Take your clean jars and just brush some watered down white glue or decoupage medium onto the jar or the paper, whatever is easier for you. Just try to rub out the air bubles if you can, if you can't no big deal! Who is really going to care when you are surprising them with some beautiful flowers! I also suggest another coat of decoupage glue or some clear varnish to protect the paper from water. You do have to be careful filling the jars with water and not spilling over on your paper. Then it just becomes a sticky mess!

Here are some jars with the paper glued and dried. The one on the left is a pretty Rachel Ashwell tissue paper (from Target), so it comes out kind of shear. The second from the left is a shear decorative paper with a yellow rose cutout that I glued on top of the paper and then I coated the rose in glass glitter. The third and fourth are scrapbook papers.
The next step is making the wire hanger. I don't really measure anything when I work, so I apologize for that, but 10-12" of wire should be a good size depending on your jar. I used jars that were about 4-7" high and 3-4" diameter. A pair of needle nose pliers works well to curl the ends of your wire like photo above. The rings you make will go on either side of the jar top and you will wrap a piece of wire through these holes and around the top of the jar.


The second piece of wire wraps around the top of the jar and through the holes. You pull the two ends tight at the back of the jar and twist them together. You then bend the ends back towards the glass so the pointed ends are not sticking out.

After the handle is secure the fun part begins, embellishing! Look through your stash of supplies for buttons, lace, ribbons, tags, fabric scraps, etc.

This one has a vintage look. I took a piece of white lace trim and dipped it in some watered down burnt sienna paint and it gave it that tea-stained look. Of course you can just dip it in some tea also. I used a big old button and some mettalic thread. I have also added a tag to each of my jars to personalize them for the recipient.

This is my shabby jar. I used some textured wallpaper to wrap the jar and a piece of Shabby Chic fabric cut with pinking shears. I made a coordinating tag and tied the jar with some funky yarn.
This purple jar is such a pretty spring color. I made this one with scrapbook paper tied with white lace trim and embellished the gift tag with some glass glitter for a little sparkle.

On this pink blossom jar, I used a printed tissue paper, pink midori ribbon, a hanging pink diamond drop and the tag is embellished with stick on rhinestones. Any charms will do to add on your jar, think of something your recipient loves. I already know I am going to attach a little butterfly charm on for one of my friends.

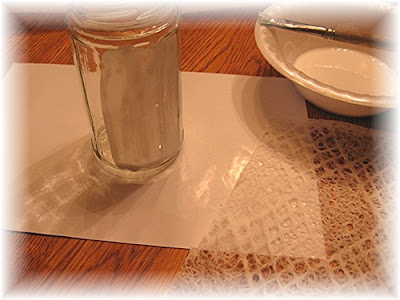
This is another really simple idea. Just take a lace doily, or a fabric circle would work too, secure with a rubber band at the top of the jar and tie with a ribbon. I love the ribbon colors on this one.

This last one is covered in a sheer decorative paper as mentioned at the beginning of this post. But I have also added a pearl trim to the bottom, just hot glued on and a springy green Midori ribbon with gift tag embellished with an old button.

I love the way this collection of jars looks. I can't wait to fill them with fresh flowers and deliver to my special friends. I will post a pic of them filled with blossoms on May 1st.
Have fun creating your May Flower Jars and please post a pic on your blog if you have made some and leave us a comment so we can check yours out too!
Or if you don't have a blog, send me a pic by email!


